Drone Technology & DIY Projects
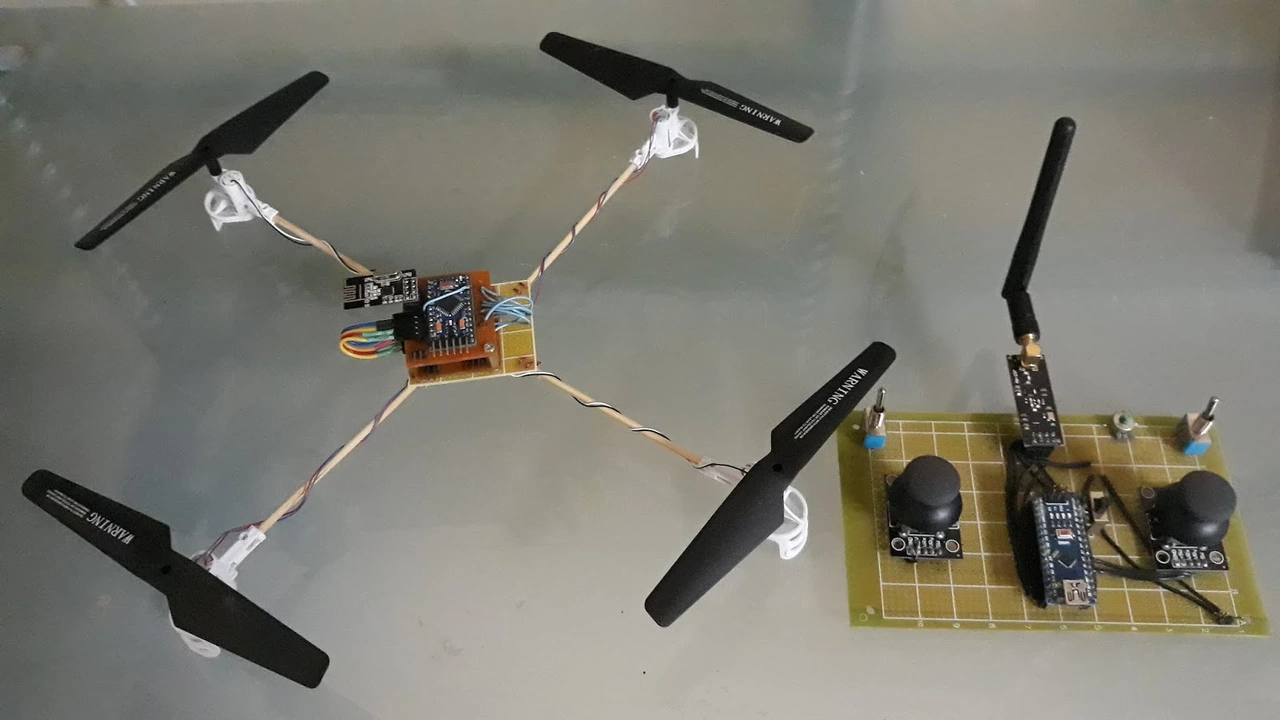
Want to fix, upgrade, or build parts for your drone without paying a shop? This category is full of hands-on drone technology and DIY projects you can actually finish at home. I focus on clear steps, the right tools, safety tips, and quick tests so you see results fast.
Projects range from tiny fixes like replacing a torn propeller to small electronics builds such as a custom antenna for better remote range. Each post lists materials, time required, difficulty, and a compact troubleshooting section. You won't find vague theory here—just practical instructions, photos of key steps, and real-world testing advice that works on common hobby drones.
What you can build and why it matters
Build a simple antenna to improve signal and reduce dropouts while flying. That project uses basic parts—coaxial cable, a connector, and a bit of solder—and it can change how far and reliably your controller talks to the drone. Other useful projects include motor maintenance, ESC calibration, vibration dampening mounts, and lightweight camera rigs that cut bounce on video. Small upgrades like mounting foam, balancing props, or trimming unnecessary weight often give the biggest performance gain for low cost.
Each guide explains not just how to do the task but why the step matters. For example, when soldering an antenna connector, a cold joint will eat signal strength; when balancing props, tiny weights change vibration dramatically. These are the details that separate a passable repair from a lasting fix.
Tools, safety, and testing
Keep a basic kit: small screwdrivers, hex keys, wire strippers, a soldering iron, multimeter, heat shrink, zip ties, and a few spare connectors. Work with batteries removed, props off, and use safety glasses when soldering or cutting. Lay out parts on a tray to avoid losing tiny screws after a crash. Test changes in a wide, open area and bring a helper to watch for range or signal issues while you hover at low altitude.
When testing an antenna, measure and cut cable to the correct length for your radio frequency, strip cleanly, solder solid joints, and mount the antenna away from motors and power wires. Check signal on a short walkaway and log the distance where the link degrades. If you see sudden dropouts, check the connector, shielding, and nearby interference sources before swapping parts.
On this page you'll find projects categorized by difficulty and time so you can pick what fits your weekend. I add new guides regularly, including photo steps and a simple tool checklist. Try one small project today—replace a prop, rebalance it, or build that antenna—and you’ll notice better control and smoother flights right away.
Each post includes a short parts list with price ranges so you can budget the project, and a clear time estimate—most simple fixes take 15 to 60 minutes. I show common mistakes to avoid, like overheating connectors or using the wrong sized prop adapters. For electronics projects I include a simple wiring diagram and clear photos of solder joints. When you read a guide, start by reading the parts list and safety notes, then lay out tools in order before you begin. If you are unsure about a step, pause and ask for help or practice on scrap parts. Small patience now prevents big repairs later every time.
How to build a simple antenna for a remote control drone?
In my latest blog post, I guide you through the process of building a simple antenna for a remote control drone. We start with gathering the necessary materials, which include a coaxial cable, wire cutters, and a soldering iron. Then, we delve into the steps of cutting the cable to the appropriate length, stripping it, and soldering the ends. I also share important tips on how to properly install the antenna to ensure optimal drone performance. Lastly, I explain how to test the new antenna to make sure it's functioning correctly.
- Science (3)
- Technology and Media (2)
- Sports (2)
- Video Streaming Technology (1)
- Industrial Lighting Applications (1)
- Video Production Tutorials (1)
- Film Production Equipment and Resources (1)
- Drone Technology & DIY Projects (1)
- Stage Lighting and Equipment Guides (1)
- Online Video Streaming Guides (1)
-
Why are LED lights so costly? Is the manufacturing cost so high?
27 Jan 2023 -
Cyclone Montha Heads for Andhra Pradesh Landfall: 110 km/h Winds, Widespread Flooding Expected
28 Oct 2025 -
What is the future of broadcast equipment?
23 Jul 2023 -
Who buys movie equipment for independent or feature films?
30 Apr 2023 -
Cyclone Montha Slams Andhra Coast, Wipes Out 43,000 Hectares of Crops
24 Nov 2025
20.07.23
Maverick Renfield
0