Stage Lighting and Equipment Guides
If you work with stage lights, one thing you must nail is DMX addressing. Get that right and your lights behave. Get it wrong and fixtures won’t respond or two fixtures act as one. This page gives straightforward, practical steps for setting DMX addresses, plus quick gear tips you can use today.
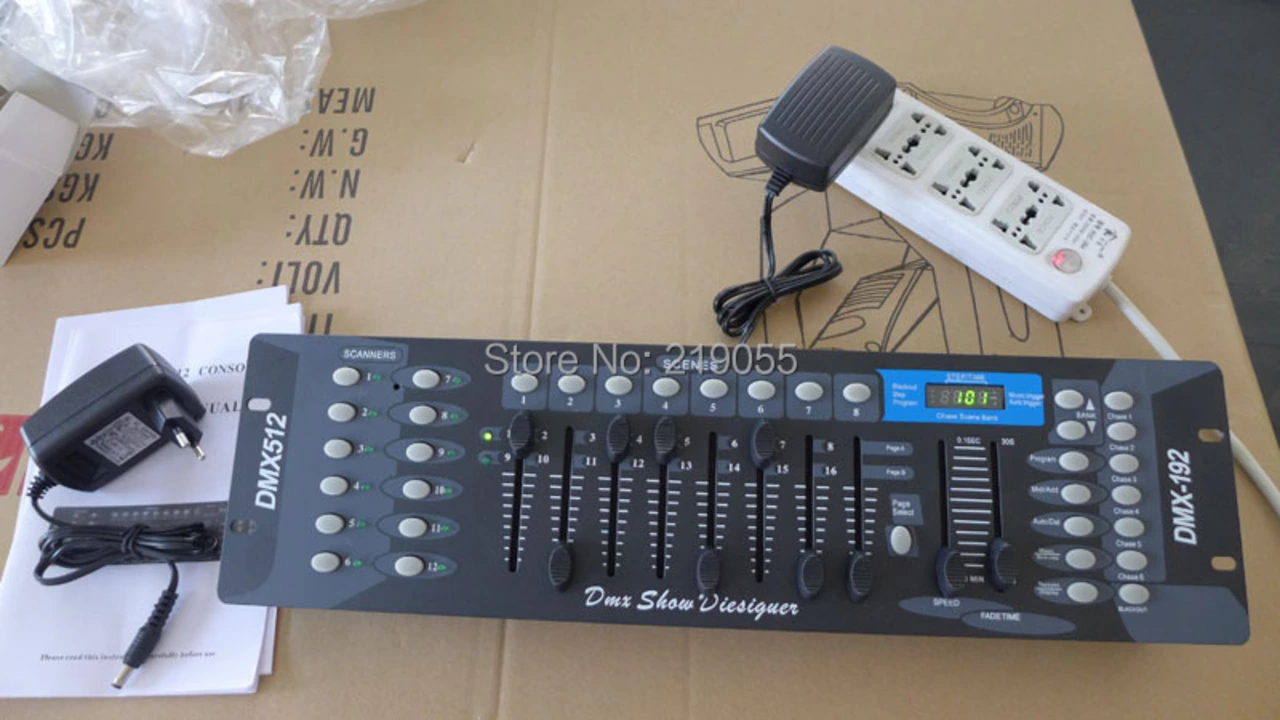
Setting DMX Address: Quick Steps
Start by checking the fixture’s DMX channel count and mode. Fixtures often have multiple modes (e.g., 1, 3, 10 channels). Pick the mode that matches the features you need. Next, choose a start address — this is the first channel the fixture will use. If a fixture needs 6 channels and you set start address 17, it will occupy channels 17–22.
Most fixtures use either a digital menu or dip switches to set the address. If the fixture has a menu: use the arrow buttons to find "Address" or "DMX Addr" and enter the start number. If it has dip switches, convert the desired address into the binary dip combination (many fixtures include a chart). Always double-check the manual for that model.
After addressing, chain fixtures with standard DMX cable (not microphone cable). Connect the controller’s DMX OUT to the first fixture’s DMX IN, then OUT to the next IN, and so on. At the last fixture use a DMX terminator (a 120-ohm resistor between pins 2 and 3) to avoid signal reflections. Power up and test each fixture from your console or a simple DMX tester to confirm channels respond correctly.
Practical Tips & Common Mistakes
Avoid overlapping addresses. Overlap is the most common problem — two fixtures set to the same channel will follow the same command. Label fixtures and cables with their start address and channel count. That saves time during load-ins and fixes.
Use the right connectors: pro rigs use 5-pin XLR for full DMX, but many cheaper fixtures accept 3-pin. Stick to proper DMX cable and keep runs under recommended lengths or use repeaters/splitters for long runs. Use power distribution boxes with breakers and never daisy-chain power strips across many fixtures.
Clamp fixtures securely and add safety cables to every overhead lamp. Test a fixture before rigging it high. If a fixture acts weird, check the mode — wrong mode can change channel mapping and make troubleshooting hard. Keep a pocket notebook or phone photo of your patch and addresses for quick reference.
Want a simple starter checklist? Check mode, set start address, chain in order, terminate last fixture, label, and test. Follow those steps and setup becomes faster and less stressful. More guides on choosing controllers, cable types, and rigging gear are here to help as you build your setup.
How to set a DMX address for stage lighting equipment?
Setting a DMX address for stage lighting equipment is an essential task for any lighting technician. First, you need to understand that each lighting fixture on a DMX universe requires a unique address. The process involves selecting the right mode on your lighting console, then assigning an address to your fixture. Remember that the number you assign should correspond to the DMX channel you want the light to respond to. It may seem tricky, but with practice, you'll be setting up your stage lighting like a pro in no time!
- Science (3)
- Technology and Media (2)
- Sports (2)
- Video Streaming Technology (1)
- Industrial Lighting Applications (1)
- Video Production Tutorials (1)
- Film Production Equipment and Resources (1)
- Drone Technology & DIY Projects (1)
- Stage Lighting and Equipment Guides (1)
- Online Video Streaming Guides (1)
-
What are industrial applications of led?
12 Mar 2023 -
Jammu Students Get 80-Day Winter Break as Delhi Cuts Vacation to 6 Days Amid Air Quality Crisis
17 Nov 2025 -
Who buys movie equipment for independent or feature films?
30 Apr 2023 -
Why are LED lights so costly? Is the manufacturing cost so high?
27 Jan 2023 -
How to build a simple antenna for a remote control drone?
20 Jul 2023
27.07.23
Maverick Renfield
0